Showing posts with label birthday. Show all posts

Thursday, September 29, 2011

Happy Bird-day Cake


My darling is turning 5 this month! Many moons ago, he already requested an angry bird cake for his birthday. After much googling, I found some really nice angry bird pictures. I downloaded the pictures onto my iPad.

Making this cake was nothing but time consuming! Can you believe, I took Friday off from work, just to work on the cake. After running some errands in the morning, I start working on mixing the colors. Getting the right color is actually harder than making the bird itself. After getting all the color I need for the birds, I call it a day.

I spend my Saturday baking and making birds. We are hosting a BIRD-day party for him on Sunday. This weekend I baked a total of 4 cakes and a kuih talam. Good thing we do catering, if not we'll have just cake party. If you know me well, you know I can't cook  :(( I like to bake, but I don't like to cook.

The cake was actually completed 30 minutes before our guest arrived. Not only I was pleased, all of our guest were impressed! After all the hard work, I deserve the compliments :))) **pat myself on the shoulder**


HAPPY BIRTHDAY, DARLING!


Things that you'll need:

Fondant
Gumpaste
Foodwritter (edible marker)
Color, lots of color
Pictures
iPad, optional.


Meet the casting crew


Happy BIRD-day!!!


Sunday, January 2, 2011

Princess Torte


That's right, it's my birthday today.

My family always celebrate my birthday together with new year eve party, as if I was new year baby. This year I didn't cut my cake during the party.

Yesterday, we all woke up pretty late after staying up past midnight for the new year eve party. No plan on new year day, I decided to make myself a birthday cake.

For many years, I got mango mousse cake for birthday. Not that I don't like mango mousse cake, I still like it, but I want something special on my special day. Only one cake is extraordinarily special for this special occasion. Swiss Princess Torte that is. I love its elegant beauty. It is one of the most simple yet elegant looking cake.

As I read the recipe, I almost give up the idea, there were three ingredient that I don't usually use: half and half cream, marzipan and potato flour. It's New Year day, all stores were closed. If I short any of these, I just cannot produce a Princess Torte today. I will have to wait till tomorrow which is my birthday. Do I really want to work on my birthday cake on my birthday? No.

I was scouring my kitchen cabinets and fridge. A-ha! I have everything needed. I can't believe I'd bought so many things that I don't usually use. Princess Torte is meant to be this year birthday cake.

A Swedish Princess Torte is usually made for birthdays and other special occasions. It has three layers of genoisie/sponge cake that has custard cream filling and brushed with jam. The cake is topped with a heap of whipped cream on top to give it a domed look then a pastel green marzipan topping is rolled and stretched over the entire cake.

Although this cake is simple looking cake, "simple" does not in any way mean "easy". There was an accident when I trying to cover the cake with the marzipan. The marzipan was 'accidently fell' on the cake off-centered. I quickly pull the marzipan over the cake and it became a little messy as the cream were already adhered to the marzipan. As I was doing it, I was crying, oh no, oh no, OH NO, MY CAKE! No one came to my aid. Their eyes were clued to the hockey games. Well, they can't do much to help. Without panic, I slowly cut the excess marzipan and wipe away the cream. From the accident, I realize I should have just lightly cream coat the side of the cake NOT apply half an inch of whipped cream, which make it harder when I trying to smooth the marzipan cos the marzipan is a little mushy.


Princess Torte
adapted from Tartelette


For the custard:
  • 2 tbsp cornstarch
  • 2 tbsp granulated sugar
  • 1 1/2 c half-and-half, divided
  • 3 large egg yolks
  • 1 tbsp pure vanilla extract
  1. In a small bowl whisk together the cornstarch, sugar, and egg yolks.
  2. Slowly add in 1/2 cup of the half-and-half and whisk until smooth.
  3. In a saucepan set over medium heat, bring the remaining half and half to boiling point.
  4. Slowly whisk the hot cream over the egg yolk/cornstarch mixture to temper the eggs.
  5. Pour the mixture back into the saucepan and cook over medium heat, stirring constantly until the mixture thickens to a custard. It should take about 5 minutes. It is important to constantly stir to prevent the bottom from curdling or burning. If that happens, take a balloon whisk and whisk vigorously. If you fear your custard curdled too much, remove from the heat and pass it through a fine sieve before proceeding with the recipe. Off the heat, stir in the vanilla and pour the custard into a bowl to let it cool.
  6. Press a piece of plastic wrap on the surface to prevent a skin from forming while it cools. Let it cool to room temperature before refrigerating.


For the cake:
  • Fine dry bread crumbs for the pan
  • 1/2 c sifted unbleached all purpose flour
  • 1/2 c potato starch/flour - substitute same amount of cornstarch if the former is not available
  • 1/2 tsp baking powder
  • 4 large eggs, separated
  • 1/8 tsp salt
  • 3/4 c plus 2 tablespoons granulated sugar
  1. Preheat the oven to 350 degrees F.
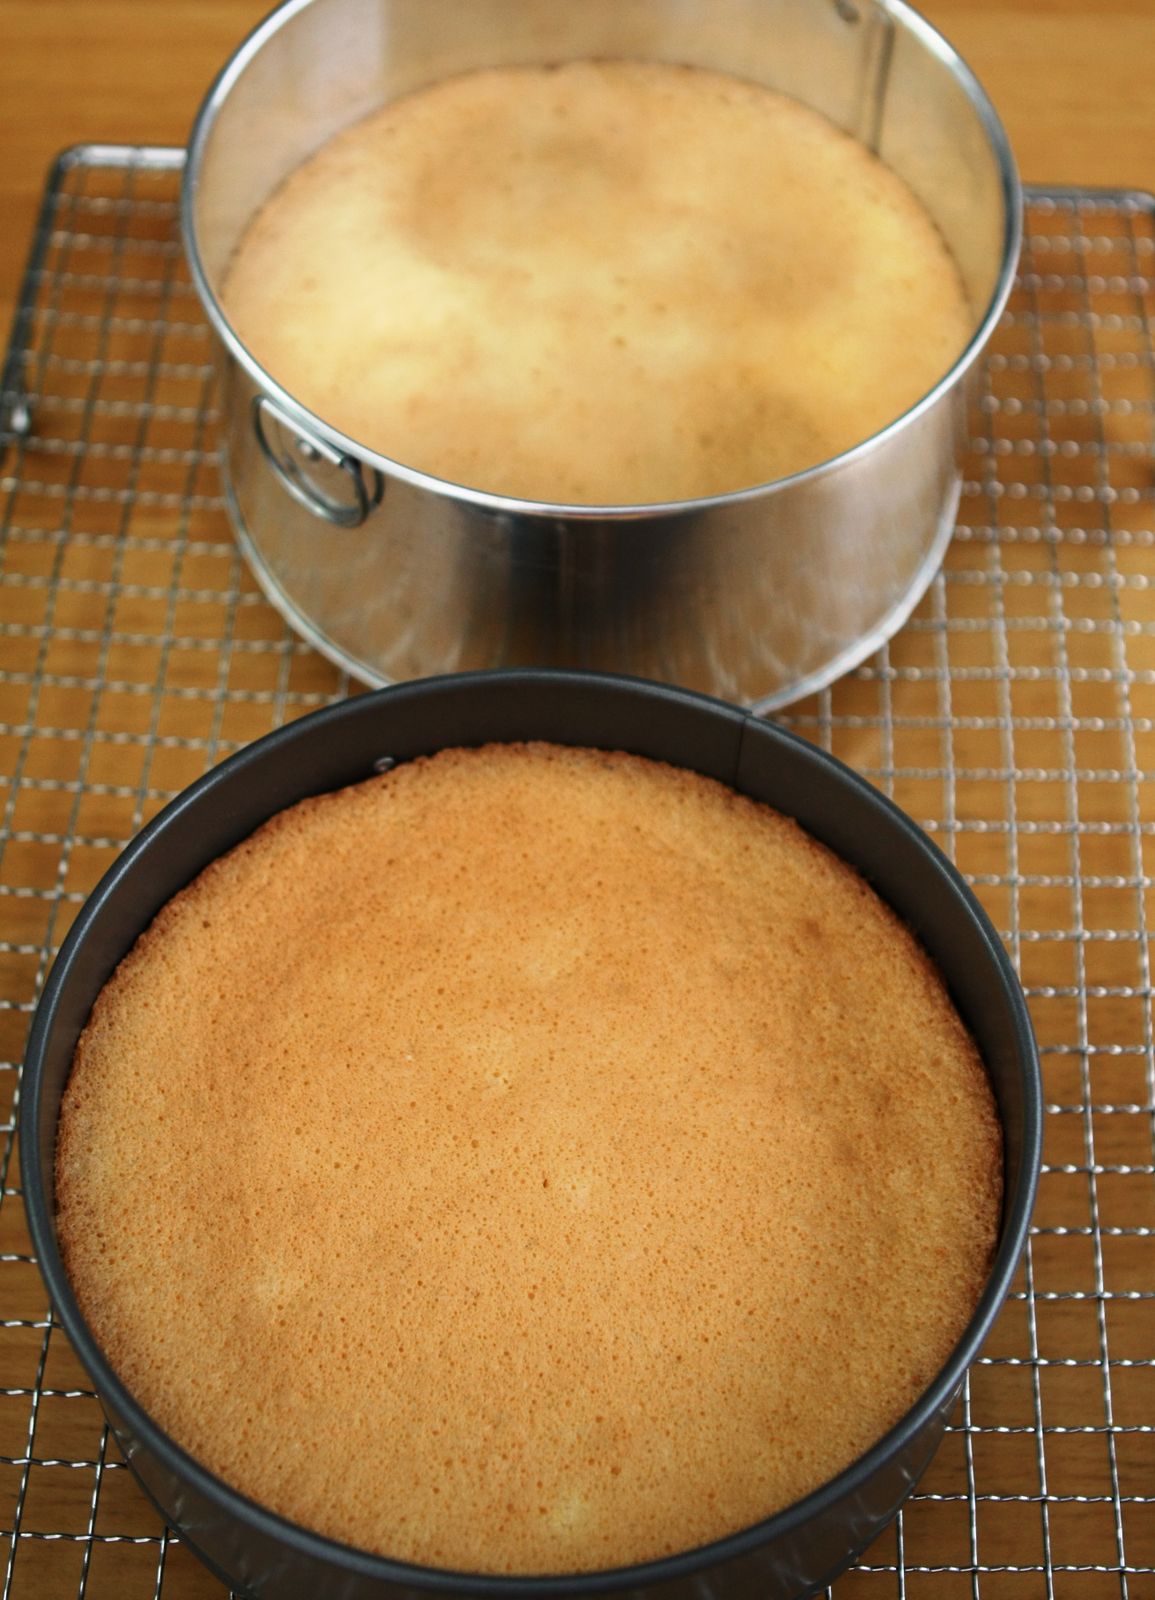
  2. Coat a 9-inch spring form pan with cooking spray. (I used two 7" pans)
  3. Line the bottom of the pan with a round of parchment paper and coat with cooking spray. Dust the inside of the pan with the breadcrumbs and tap out the excess. This is very traditional of Eastern European cakes to line the pan with a coating of fine crumbs. In the older days, it replaced parchment paper, soaked up extra moisture. It also forms a tight crumbs on the outside which makes it easier when you frost the cake after baking.
  4. Sift together the flour, potato starch, and baking powder. Set aside.
  5. In a stand mixer fitted with the whisk attachment, whip the egg whites and salt on medium speed until the whites are shiny and form stiff peaks but are still smooth, not lumpy.
  6. Sprinkle in about one-quarter of the sugar, then add 1 egg yolk and beat for about 10 seconds.
  7. Repeat the process 3 more times. Beat a couple more minutes, until the mixture forms a ribbon.
  8. Gently fold in the flour mixture in 4 additions, taking your spatula from the bottom of the bowl, up the side and over the batter.
  9. Pour the batter into the pan, and set it on baking sheet. Rap the sheet a couple of times on the counter top to smooth the top of you cake.
  10. Bake for about 30 minutes, until the cake is golden brown and a toothpick inserted into the center comes out clean.
  11. Cool the cake on a wire rack for 10 minutes. Run a knife around the sides of the cake to release it from the pan, if necessary. Release the cake from the spring form pan, cover the cake with a plate or another wire rack and invert. Remove the bottom of the pan and the parchment paper. Cover the cake with another wire rack and invert again. Let it cool completely before proceeding with the rest of the recipe.


For the Marzipan Coating:
  • Two 7 oz packages marzipan (I use only 1 7-oz marzipan)
  • Green food coloring
  • Powdered sugar for dusting
  1. Break the marzipan into small pieces into a medium bowl and knead with your hands. Your natural body heat will help smooth it out and add in the coloring.
  2. Add 3 or 4 drops of green food coloring and knead it into the marzipan to get a pale shade of green. You can add a couple more drops of the coloring but do so carefully. The final shade should be pastel and not neon green.
  3. Dust your work surface with powdered sugar.
  4. Shape the marzipan into a 6-inch disk, coat both sides lightly with sugar.
  5. Roll the marzipan to a circle about 16 inches in diameter and less than 1/8 inch thick. Don't be afraid to add more powdered sugar to your work surface as you roll to prevent it from sticking. You can also roll the marzipan between two sheets of plastic wrap or parchment paper if they are wide enough.


To assemble the cake:
  • 2 1/2 cups heavy cream
  • 1/3 cup seedless raspberry jam
  • Marzipan coating


  1. Cut the cake into 3 equal layers, set aside.
  2. In a mixer with the whisk attachment, whip the cream until thick and firm. Transfer one-third of the cream to a small bowl, cover, and refrigerate.
  3. Remove the chilled custard from the refrigerator and give it a vigorous whisk as it will be thick after cooling. Make sure it is smooth and creamy before proceeding.
  4. Fold the portion of the whipped cream that you did not refrigerate into the custard until smooth.
  5. Since the cake is not easily moveable once completed (heavy and moist), set the bottom cake layer, cut side up, onto platter and arrange 4 strips of parchment paper under the edges cake to keep your plate clean as you assemble it.
  6. Spread the raspberry jam onto the cake, and then spread half the custard cream mixture evenly over the jam.
  7. Invert the top cake layer onto the custard cream, cut side up.
  8. Spread the remaining custard cream over the layer and top with the remaining cake layer. Spread about one-quarter of the refrigerated whipped cream in a very thin layer around the sides of the cake.
  9. Evenly spread the remaining cream onto the top of the cake with an offset spatula.
  10. Remove the paper strips from underneath the cake and refrigerate the cake for 30 minutes to an hour. It does help with firming the creams again before applying the marzipan so it does not mush it down. You can also freeze it for an hour.
  11. Remove the cake from the refrigerator and gently set the marzipan on top of the cake so that it drapes over the cake. Press it gently so it adheres to the sides of the cake, covering it completely. With a sharp knife, trim away the excess marzipan so that the edges. Refrigerate until ready to serve.


There are some marzipan left. I use the excess marzipan to make three roses.  

Here's steps for marzipan roses: 
  1. Roll the marzipan to about 1/8" thickness.
  2. Using a small circle cutter about 1.5" in diameter, cut out 10 circles for each rose.
  3. Take a small chunk of the remnants left from cutting the circles and create a small ball to make a teardrop shape.
  4. Take each circle and, using primarily your thumbs and index fingers, flatten it into petal shapes so that the edges are thinner at the edges. Dont' try to make it look perfectly circular. Learn to love little imperfections.
  5. First row of petals: Take one of the prepared petals, wrap the teardrop base. Take another petal and overlap the first wrapped petal.
  6. Second row of petals (3 petals required): Wrap each of the 3 petals one by one, overlapping the preceding one. Continue in this manner until all 3 are attached. Use your fingers to adjust the position of the petals, if you wish.
  7. Third row of petals (5 petals required): the third row of petals should be curved slightly. Attach each petal as in the previous steps, using your fingers to gently curve the edge outwards.
  8. Use the leaf cutter to cut out 3 leaves. Using toothpick to imprint the leaf vein.


After spending half a day, my Princess Torte is ready to serve.

Even Tony likes this cake. He says this is the best cake, ever. Can you believe?from someone who doesn't like dessert. It's more than just a compliment!

At 2.30pm, this is what it looks like outside of my kitchen window... wet and foggy. Look like Spring has arrived 3 months early. No way!

Friday, December 17, 2010

Simple is best

I have been baking a lot in the past couple of weeks. Trying new recipes and frequently finding myself disappointed by the results.

It's been a little frustrating. Especially when I follow every steps in the recipe yet my product turn out totally differently from what it should be.

Though it's disappointing, but it won't stop me from continue to try.

Today, once again, something new, something I wanted to do for a long time - fondant cake. My very first fondant cake, ever.


Playing with fondant and gumpaste is fun! Ryan thinks it's play-doh. Adult play-doh.

Good thing about fondant cake is you can have some of the deco done ahead of time. For this cake, the bow and the letters were prepared days before. This cake was assembled on Wednesday night.

This birthday cake was supposed to take to the office on Thursday but plan changed when I learned Ryan's school will be closed at 12 noon on Thursday and open all day Friday. Huh, so confusing? Weeks ago, I submit my day off request for Friday, thinking school closed on Friday. Well, I guess I was wrong.


It was JB birthday on Tuesday, but he only get to cut this cake on Friday. On Friday, I brought this cake to the office, everyone in the office were impressed. They all want to keep the cake the way it is. Simply too good to cut.


I'm pleased with the result of this simple looking fondant cake. I'm even happier when everyone loves it!

Note: I will follow up with another post detailing step by step instruction in fondant/gumpaste decorating. Click here for the bow.