Showing posts with label cake. Show all posts

Sunday, February 19, 2012

Covering a cake with fondant


This cake was made specially for a girl at work on her birthday. A girl who has strong affection to everything purple. When she sees purple, her eyes sparkle.

Val is originally from Eastern Europe. She is the most positive thinking person I've ever seen. Being with her make me realize what is the positive energy. Have you ever feel drained when you're with someone? She would tell you because that person is sucking up your energy. Don't worry, she is not phychic or anything like that. She loves yoga and read books related to health, foods and well being. She would tell you life is good, life is beautiful, you're beautiful...

She is one of my favourite person in the office, and of course she is liked by many for her positive and playful characters.

Happy Birthday Valeriya and Many Happy Returns!!


How to cover a cake with rolled fondant.

1.  Prepare a cake by applying thin layer of frosting, this is called crumb coat. It seals in the moisture of the cake. Chill the cake in the fridge (or freezer) before you cover them with fondant for a few minutes.

2.  Roll fondant into a ball, kneading until it's soft and pliable. Using a toothpick, add dots of color in several spots.

3.  Knead color into your fondant ball. Continue kneading until color is evenly blended; add a little more color if needed to achieve your desired color.

4.  Knead it until it is a workable consistency. If fondant is sticky, knead in a little confectioners' sugar. Lightly dust your work station or mat and rolling pin.

5.  Roll out fondant sized to your cake. (for a 8"cake with 4" height, the optimal size will be a fondant circle about 17" across, with a thickness of about 1/8" - use rolling pin rings for consistent thickness)

6.  Gently lift the mat and fold the opposite side, and position on cake.

7.  Shape fondant to sides of cake with smoother (if you don't have smoother, use your hands, make sure you dust your hands with confectioners' sugar). Beginning in the middle of the cake top, move the smoother outward and down the sides to smooth and shape fondant to the cake and remvoe air bubbles. If an air bubbles appears, insert a pin on an angle, release air and smooth the area again.

8.  Trim off excess fondant using a spatula or knife.

9.  Your cake is ready for decoration.


~*~*~*~*~*~*~*~*~*~*~*~*~*~*~*~*~*~*~*~


Thursday, January 6, 2011

White Chocolate Cheesecake


I'm a big fan of white chocolate. When come to chocolate, my number one choice is white chocolate followed by milk chocolate. Dark chocolate never my cup of tea.

One of my girl friend, V is chocolate crazy lover and she eats only dark chocolate, which is good for her. Dark chocolate has so many health benefit especially to women. One of which is the anti-aging properties. And it also help protect the heart. With so many good benefit, dark chocolate is the healthy choice for sure.

I never have heard any good about white chocolate itself, but this white chocolate cheesecake is really good. Merely good is not enough. I think it's awesomely good!

Happy baking!

White Chocolate Cheesecake with Caramel Glaze
adapted from not so humble pie

Caramel Sauce

1 1/2 c granulated sugar
1 3/4 tsp lemon juice
1 pint heavy cream
4 tbsp unsalted butter

Note: This isn't the easiest way for most home cooks to go about making caramel sauce. Melting almost pure sugar in a pan is pesky and it can burn quite easily. If you're not feeling up to attempting this part of the recipe, feel free to buy your favourite caramel sauce and warm it gently to glaze the cheesecake.
  1. In a medium sauce pan over medium high heat, combine the sugar and lemon juice. Stir with a wooden spoon until the sugar is mostly melted then set aside the spoon and swirl the pan over the heat to keep the color even throughout.
  2. Continue to cook and swirl until it sugar turns a medium amber color. Watch it carefully, the sugar will quickly darken and should it become dark brown or black it will taste bitter and unpleasant.
  3. When the sauce turns the right color slowly whisk in the cream. If the caramel hardens with the addition of the cream, do not worry. Just continue to add the cream and bring the mixture back to a  boil over medium heat. Continue to stir until the sugar has melted. Allow to boil for 5 minutes then remove from heat and stir in the butter.
  4. Pour into a heat safe container and chill until ready to use.

Crust

10 oz graham crumbs
7 tbsp unsalted butter
  1. Pre-heat the oven to 375°F.
  2. Combine the graham cracker crumbs with the melted butter and press into the bottom and 1 1/2 in. up the side of a 10 in. spring form pan.
  3. Bake for 10 minutes and then allow to cool completely on a wire rack.

Cheesecake Filling

3 – 8 oz (250g) cream cheese, room temperature
1 1/4 c granulated sugar
1/2 c heavy cream
8 oz good quality white chocolate, chopped
5 large eggs
1 tsp pure vanilla extract
pinch salt
boiling water

 
1.             Reduce the heat to 325°F and prepare the cheesecake batter.
2.            Place the chopped white chocolate into a heat safe bowl and set aside.
3.            Bring the 1/2 c of cream to a simmer over medium heat in a small sauce pan.
4.            Pour the hot cream over the white chocolate, jiggle the bowl to submerge it and allow to stand for one minute. Stir the chocolate gently until melted completely.
5.             In your mixer with the paddle attachment, beat the cream cheese until smooth and lump free.
6.            Add the sugar and mix, scraping down the sides of the bowl as needed.
7.             On medium speed, slowly add the white chocolate ganache. Once combined add the eggs, one at a time, beating on low speed until each egg is incorporated. Once added all the eggs, mix in the vanilla and salt and pour into your prepared pan.
8.            Set the pan onto a couple large sheets of aluminium foil and smooth them up the sides of the pan to waterproof.
9.            Set the cheesecake into a large roasting pan and then place in the oven. Pour the boiling water into the roasting pan, filling to about one inch (no higher than the lowest edge of aluminum foil).
10.        Allow to make at 325°F for one hour then reduce heat and bake at 300°F for an additional 60-90 minutes until the center is just set. 
11.          Remove from the oven and allow to cool completely on a wire rack. Once cool chill for at least 4 hours before serving.
12.         To glaze, gently warm the 1 cup of the caramel sauce on the stove or in the microwave until slightly runny and then pour onto the cheesecake. Smooth the caramel over the cake and you're ready to serve.


If you find caramel is too sweet, you can skip the caramel. Personally, I prefer plain without any sauce.

Enjoy!


Wednesday, January 5, 2011

Raspberry Red Velvet Cake


I know I didn't do very good job in keeping my blog up to date. Please bear with me, I'm working my way to post every cakes and desserts on my blog. This cake was made last week when Tony invites his staff over for Christmas get together.


For this get together party, I have been start baking a day before. I made a total of 4 desserts, beside this one, I also made white chocolate cheesecake, kuih talam, and kuih bangkit.


Raspberry Red Velvet Cake 
 
  
3 large egg whites
1 oz red food coloring 
1 1/2 tsp pure vanilla extract
200 g cake flour
200 g superfine sugar
3 tsp baking powder
1 tsp cocoa powder
1/4 c canola oil
4 tbsp unsalted butter
1/2 c low-fat buttermilk

  1. Preheat your oven to 350°F. Lightly butter and flour 2 - 8" round pan, place a round parchment paper in the bottom and set aside.
  2. In a medium bowl, combine the egg whites, vanilla and red food coloring. Lightly mix these together.
  3. In a second medium bowl, sift together the dry ingredients and set aside.
  4. In a stand mixer fitted with the paddle attachment, beat together the butter and oil for one minute on medium speed. Add the flour mixture and the buttermilk and mix on low speed to bring the ingredients together. Increase the speed to medium and beat for 1 1/2 minutes, scraping down the sides of the bowl.
  5. Reduce the speed to low again and carefully add 1/2 the red egg mixture, increase the speed to medium and mix for 30 seconds until it is incorporated. Reduce the speed and add the remaining egg mixture, and mix on medium speed for another 30 seconds until well blended.
  6. Pour the batter into your prepared pan, smoothing the surface with a spatula.
  7. Bake for 25-35 minutes until a cake tester comes out clean or the center of the cake springs back when lightly touched.
  8. Allow the cake to cool in the pan for 10 minutes and then release the cake from the sides of the pan with a quick go-round with a small offset spatula and then unmold onto a wire rack.
Now you're ready for the frosting...

 
Cream Cheese Frosting

2 - 8 oz (227 g) cream cheese, room temperature
1 tsp pure vanilla extract
1 c (115 g) icing sugar, sifted
1 1/2 c (360 ml) heavy whipping cream 

  1. In the bowl of a electric mixer (or with a hand mixer), beat the cream cheese until smooth.
  2. Add the vanilla and sugar, beat until smooth.
  3. With whisk attachment, gradually add the heavy cream and whip until the frosting is thick enough to spread. Add more sugar or cream as needed to get the right consistency.


Sunday, January 2, 2011

Princess Torte


That's right, it's my birthday today.

My family always celebrate my birthday together with new year eve party, as if I was new year baby. This year I didn't cut my cake during the party.

Yesterday, we all woke up pretty late after staying up past midnight for the new year eve party. No plan on new year day, I decided to make myself a birthday cake.

For many years, I got mango mousse cake for birthday. Not that I don't like mango mousse cake, I still like it, but I want something special on my special day. Only one cake is extraordinarily special for this special occasion. Swiss Princess Torte that is. I love its elegant beauty. It is one of the most simple yet elegant looking cake.

As I read the recipe, I almost give up the idea, there were three ingredient that I don't usually use: half and half cream, marzipan and potato flour. It's New Year day, all stores were closed. If I short any of these, I just cannot produce a Princess Torte today. I will have to wait till tomorrow which is my birthday. Do I really want to work on my birthday cake on my birthday? No.

I was scouring my kitchen cabinets and fridge. A-ha! I have everything needed. I can't believe I'd bought so many things that I don't usually use. Princess Torte is meant to be this year birthday cake.

A Swedish Princess Torte is usually made for birthdays and other special occasions. It has three layers of genoisie/sponge cake that has custard cream filling and brushed with jam. The cake is topped with a heap of whipped cream on top to give it a domed look then a pastel green marzipan topping is rolled and stretched over the entire cake.

Although this cake is simple looking cake, "simple" does not in any way mean "easy". There was an accident when I trying to cover the cake with the marzipan. The marzipan was 'accidently fell' on the cake off-centered. I quickly pull the marzipan over the cake and it became a little messy as the cream were already adhered to the marzipan. As I was doing it, I was crying, oh no, oh no, OH NO, MY CAKE! No one came to my aid. Their eyes were clued to the hockey games. Well, they can't do much to help. Without panic, I slowly cut the excess marzipan and wipe away the cream. From the accident, I realize I should have just lightly cream coat the side of the cake NOT apply half an inch of whipped cream, which make it harder when I trying to smooth the marzipan cos the marzipan is a little mushy.


Princess Torte
adapted from Tartelette


For the custard:
  • 2 tbsp cornstarch
  • 2 tbsp granulated sugar
  • 1 1/2 c half-and-half, divided
  • 3 large egg yolks
  • 1 tbsp pure vanilla extract
  1. In a small bowl whisk together the cornstarch, sugar, and egg yolks.
  2. Slowly add in 1/2 cup of the half-and-half and whisk until smooth.
  3. In a saucepan set over medium heat, bring the remaining half and half to boiling point.
  4. Slowly whisk the hot cream over the egg yolk/cornstarch mixture to temper the eggs.
  5. Pour the mixture back into the saucepan and cook over medium heat, stirring constantly until the mixture thickens to a custard. It should take about 5 minutes. It is important to constantly stir to prevent the bottom from curdling or burning. If that happens, take a balloon whisk and whisk vigorously. If you fear your custard curdled too much, remove from the heat and pass it through a fine sieve before proceeding with the recipe. Off the heat, stir in the vanilla and pour the custard into a bowl to let it cool.
  6. Press a piece of plastic wrap on the surface to prevent a skin from forming while it cools. Let it cool to room temperature before refrigerating.


For the cake:
  • Fine dry bread crumbs for the pan
  • 1/2 c sifted unbleached all purpose flour
  • 1/2 c potato starch/flour - substitute same amount of cornstarch if the former is not available
  • 1/2 tsp baking powder
  • 4 large eggs, separated
  • 1/8 tsp salt
  • 3/4 c plus 2 tablespoons granulated sugar
  1. Preheat the oven to 350 degrees F.
  2. Coat a 9-inch spring form pan with cooking spray. (I used two 7" pans)
  3. Line the bottom of the pan with a round of parchment paper and coat with cooking spray. Dust the inside of the pan with the breadcrumbs and tap out the excess. This is very traditional of Eastern European cakes to line the pan with a coating of fine crumbs. In the older days, it replaced parchment paper, soaked up extra moisture. It also forms a tight crumbs on the outside which makes it easier when you frost the cake after baking.
  4. Sift together the flour, potato starch, and baking powder. Set aside.
  5. In a stand mixer fitted with the whisk attachment, whip the egg whites and salt on medium speed until the whites are shiny and form stiff peaks but are still smooth, not lumpy.
  6. Sprinkle in about one-quarter of the sugar, then add 1 egg yolk and beat for about 10 seconds.
  7. Repeat the process 3 more times. Beat a couple more minutes, until the mixture forms a ribbon.
  8. Gently fold in the flour mixture in 4 additions, taking your spatula from the bottom of the bowl, up the side and over the batter.
  9. Pour the batter into the pan, and set it on baking sheet. Rap the sheet a couple of times on the counter top to smooth the top of you cake.
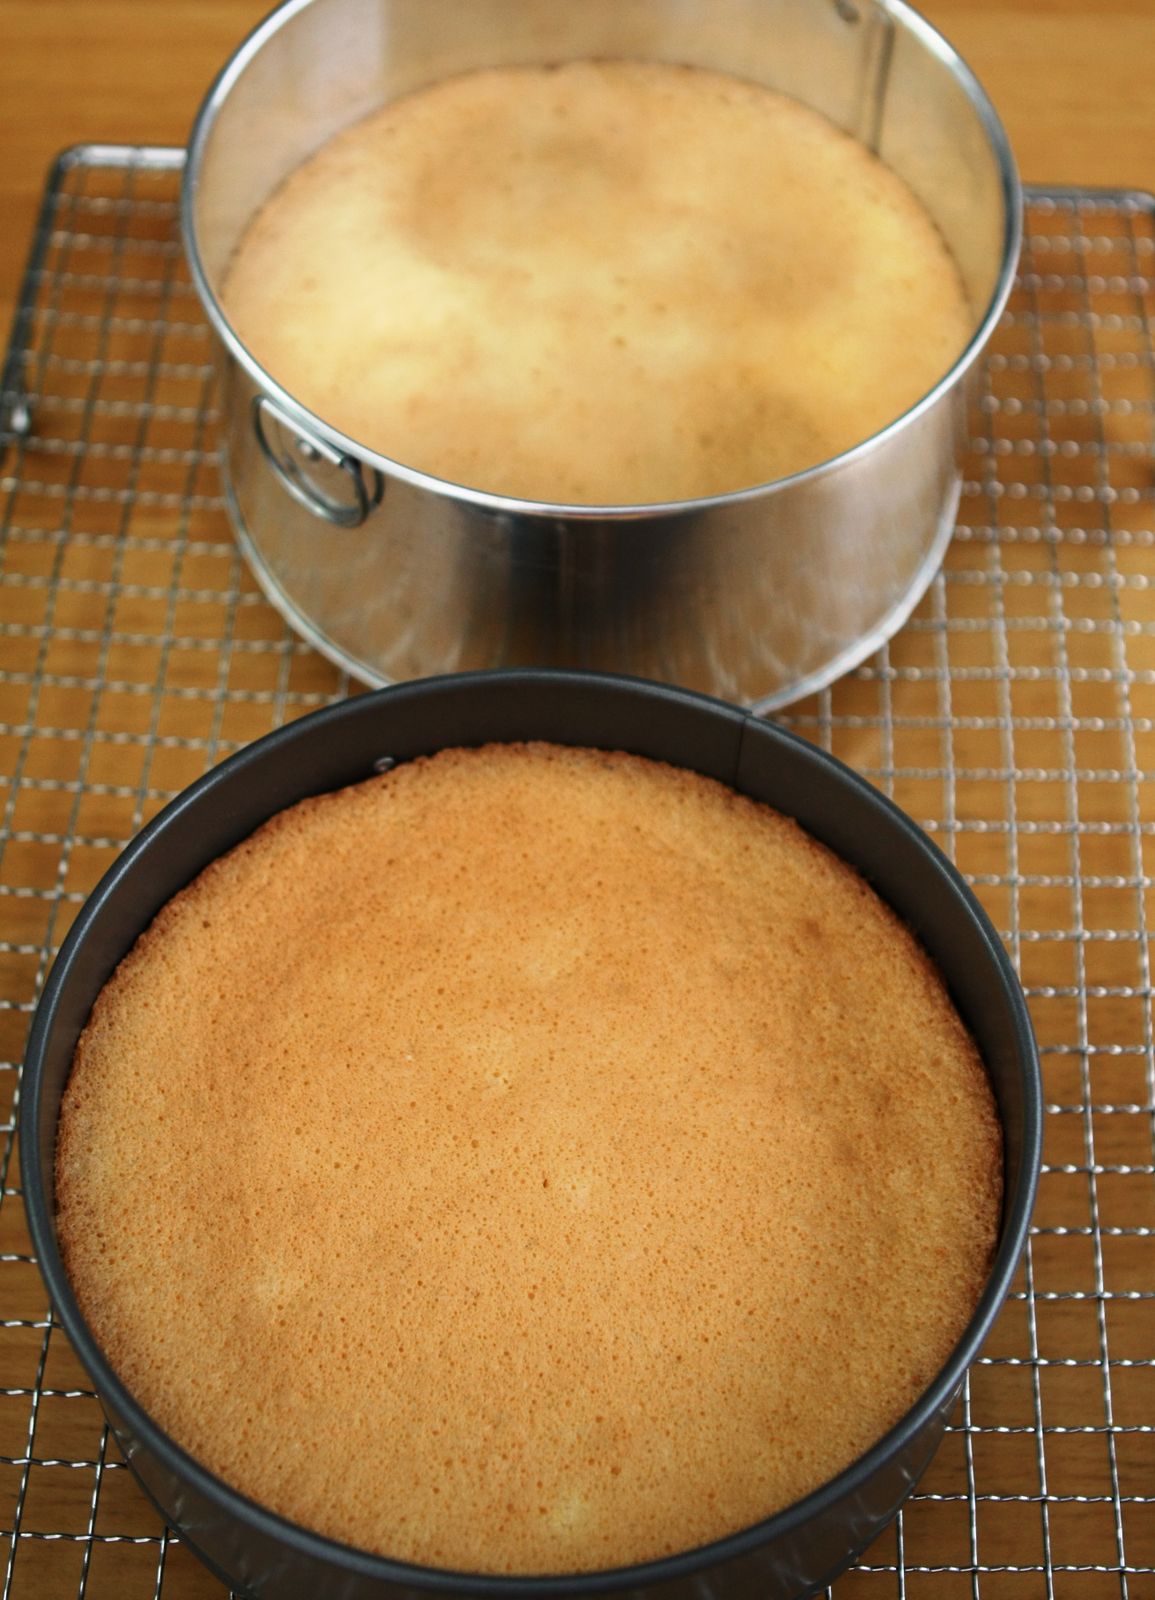
  10. Bake for about 30 minutes, until the cake is golden brown and a toothpick inserted into the center comes out clean.
  11. Cool the cake on a wire rack for 10 minutes. Run a knife around the sides of the cake to release it from the pan, if necessary. Release the cake from the spring form pan, cover the cake with a plate or another wire rack and invert. Remove the bottom of the pan and the parchment paper. Cover the cake with another wire rack and invert again. Let it cool completely before proceeding with the rest of the recipe.


For the Marzipan Coating:
  • Two 7 oz packages marzipan (I use only 1 7-oz marzipan)
  • Green food coloring
  • Powdered sugar for dusting
  1. Break the marzipan into small pieces into a medium bowl and knead with your hands. Your natural body heat will help smooth it out and add in the coloring.
  2. Add 3 or 4 drops of green food coloring and knead it into the marzipan to get a pale shade of green. You can add a couple more drops of the coloring but do so carefully. The final shade should be pastel and not neon green.
  3. Dust your work surface with powdered sugar.
  4. Shape the marzipan into a 6-inch disk, coat both sides lightly with sugar.
  5. Roll the marzipan to a circle about 16 inches in diameter and less than 1/8 inch thick. Don't be afraid to add more powdered sugar to your work surface as you roll to prevent it from sticking. You can also roll the marzipan between two sheets of plastic wrap or parchment paper if they are wide enough.


To assemble the cake:
  • 2 1/2 cups heavy cream
  • 1/3 cup seedless raspberry jam
  • Marzipan coating


  1. Cut the cake into 3 equal layers, set aside.
  2. In a mixer with the whisk attachment, whip the cream until thick and firm. Transfer one-third of the cream to a small bowl, cover, and refrigerate.
  3. Remove the chilled custard from the refrigerator and give it a vigorous whisk as it will be thick after cooling. Make sure it is smooth and creamy before proceeding.
  4. Fold the portion of the whipped cream that you did not refrigerate into the custard until smooth.
  5. Since the cake is not easily moveable once completed (heavy and moist), set the bottom cake layer, cut side up, onto platter and arrange 4 strips of parchment paper under the edges cake to keep your plate clean as you assemble it.
  6. Spread the raspberry jam onto the cake, and then spread half the custard cream mixture evenly over the jam.
  7. Invert the top cake layer onto the custard cream, cut side up.
  8. Spread the remaining custard cream over the layer and top with the remaining cake layer. Spread about one-quarter of the refrigerated whipped cream in a very thin layer around the sides of the cake.
  9. Evenly spread the remaining cream onto the top of the cake with an offset spatula.
  10. Remove the paper strips from underneath the cake and refrigerate the cake for 30 minutes to an hour. It does help with firming the creams again before applying the marzipan so it does not mush it down. You can also freeze it for an hour.
  11. Remove the cake from the refrigerator and gently set the marzipan on top of the cake so that it drapes over the cake. Press it gently so it adheres to the sides of the cake, covering it completely. With a sharp knife, trim away the excess marzipan so that the edges. Refrigerate until ready to serve.


There are some marzipan left. I use the excess marzipan to make three roses.  

Here's steps for marzipan roses: 
  1. Roll the marzipan to about 1/8" thickness.
  2. Using a small circle cutter about 1.5" in diameter, cut out 10 circles for each rose.
  3. Take a small chunk of the remnants left from cutting the circles and create a small ball to make a teardrop shape.
  4. Take each circle and, using primarily your thumbs and index fingers, flatten it into petal shapes so that the edges are thinner at the edges. Dont' try to make it look perfectly circular. Learn to love little imperfections.
  5. First row of petals: Take one of the prepared petals, wrap the teardrop base. Take another petal and overlap the first wrapped petal.
  6. Second row of petals (3 petals required): Wrap each of the 3 petals one by one, overlapping the preceding one. Continue in this manner until all 3 are attached. Use your fingers to adjust the position of the petals, if you wish.
  7. Third row of petals (5 petals required): the third row of petals should be curved slightly. Attach each petal as in the previous steps, using your fingers to gently curve the edge outwards.
  8. Use the leaf cutter to cut out 3 leaves. Using toothpick to imprint the leaf vein.


After spending half a day, my Princess Torte is ready to serve.

Even Tony likes this cake. He says this is the best cake, ever. Can you believe?from someone who doesn't like dessert. It's more than just a compliment!

At 2.30pm, this is what it looks like outside of my kitchen window... wet and foggy. Look like Spring has arrived 3 months early. No way!